Integration
The Highlights plugin is a UE4
Engine plugin. To use it, you must be able to compile the engine. SImply drop the plugin into the
Engine/Plugins/Runtime/Nvidia folder and it should get picked up by the build
process.
C++
TBD
Blueprints
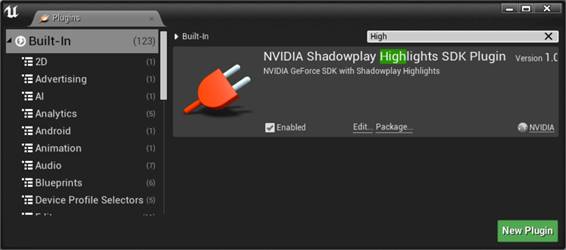
Enable in Editor
1.
Menu "Edit→Plugins".
2.
Type "Highlights" in search box.
3.
Click enable checkbox
Basic Usage
Use the right button menu to open
the function list and navigate to Shadowplay
Highlights

To start working with the
Highlights first we need to initialize them. It is done only once at the
beginning:
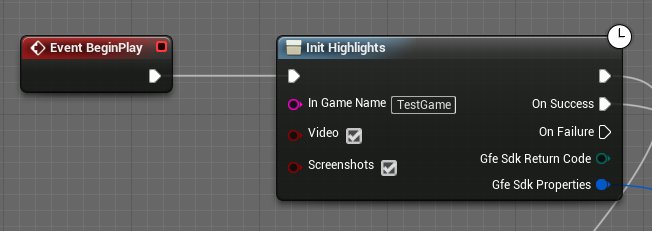
In Game Name - the name your app
will have in the GFE menu
Checkboxes Video and Scrrenshots are to request the appropiate
features of Highlights subsistem.
Use OnSuccess
and OnFailure outputs to hadle
appropriate events;
Gfe Sdk Properties is a structure with GFE SPH properties like
version and alowed features.
To check features please use the
Check Highlights function wrapper:

If feature is granted the
appropriate output pin will be activated. Also you can
use the status enumeration to validate the output.
If permissions are in "Must
ask" state, you must request them, otherwise Highlights won't record video
or take screenshots.
Permissions are requested with GFERequestPermissions function:
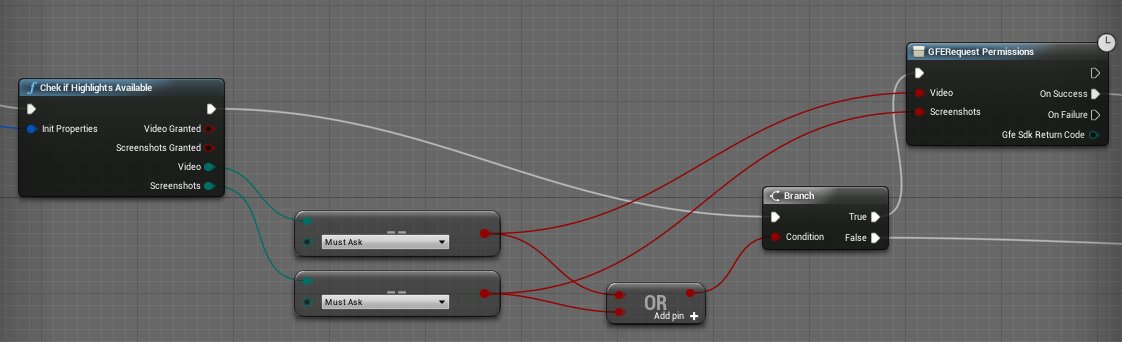
Input checkboxes correspond to
appropriate feature that request will ask the system for.
When permissions are granted we
can proceed to general setup with Configure Highlights function:

It requires the filled structure
with highlights types we are going to use. Set the checkbox "User Default
Interest" to record highlights by default.
Field ID corresponds to the
highlight id the user will be interested in.
User Default Interest is the flag
that shows GFE that this type of highlights is interesting for the user and it
should record it. If this flag is not set, the USER_NOT_INTERESTED code can be
received in GFE logs.
Highlight tags defines the
highlight category. It will be reflected in the GFE Highlights interface in
Summary page.
Significance - self explanatory. Shows how good the event in the highlight
is. Also will be reflected in the Summary page.
Name translation table: the
key-value table of the symbolic name of the locale and it's translated title.
Defauly locale:
the default language the highlights will appear in.
We need to open the group of
Highlights after that:
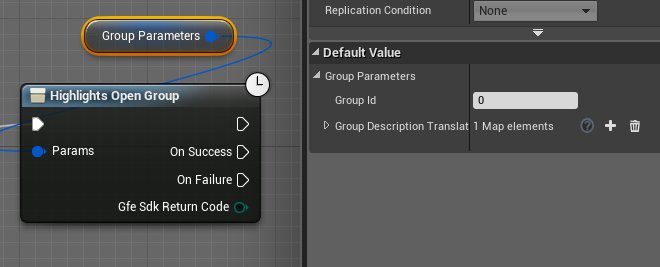
Fill the group name and
translation tables for different languages, like you did in the configuration
structure.
And then we can take screenshots
and record videos:
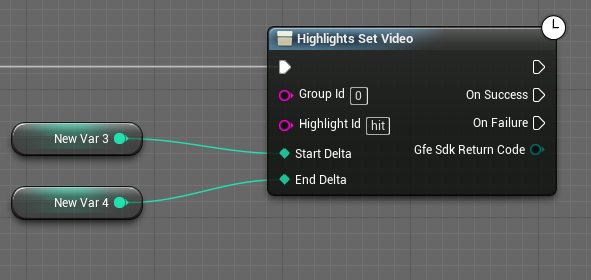
StartDelta: time in
milliseconds before the current moment, where the video file starts.
EndDelta: time in
milliseconds after the current moment, where the video ends.
Highlight ID: the ID you entered in the configuration structure in the ConfigureAsync function.
Group ID: The group ID you opened.
Then we can close group and open
summary:
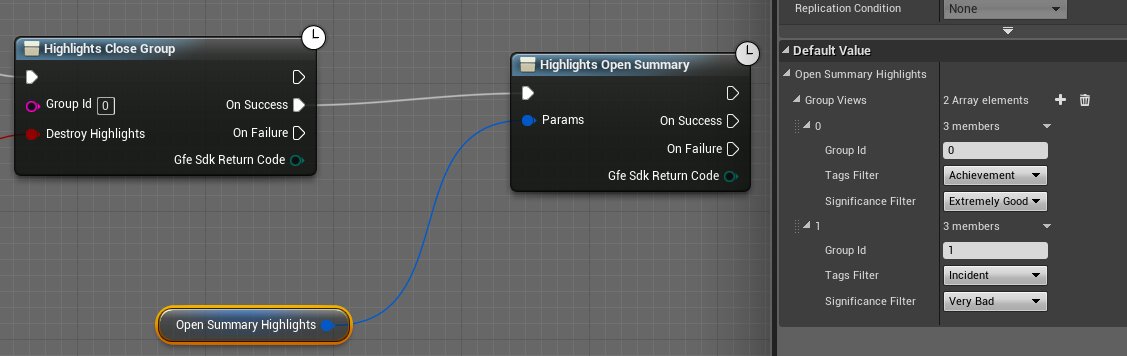
Pay attention to the fact that if
there are no highlights to show, summary page won't open. This
case can be handled with GetNumHighlights function.
The developer can check the highlights status and proceed to the menu after the
summary page or actually open the page, depending on
the game logic and the developer's decision.
The Group Views structure contatins descriprtion of groups
and filters for the highlights that should be shown on the summary page.
Also it is
important to use Poll function because it provides the mechanism to handle the OnSuccess and OnFailure events
and they won't fire without calling this function.
Beware! On Success and On Failure
events will never be triggered if the developer never calls for the Poll
function.
Use OnTick
or Delay(preferred) to poll function results:

The Poll function in the
blueprints is needed for the case if the developer has the mixed Highlights
code: partially handled in the blueprints and partially in the game code. In
that case it is up to developer to ensure that all polling and callbacks happen
in the same thread or multithreading hanlded
properly.